


 456c / 1645

MERIVOBOX - Drawer Assembly and Removal
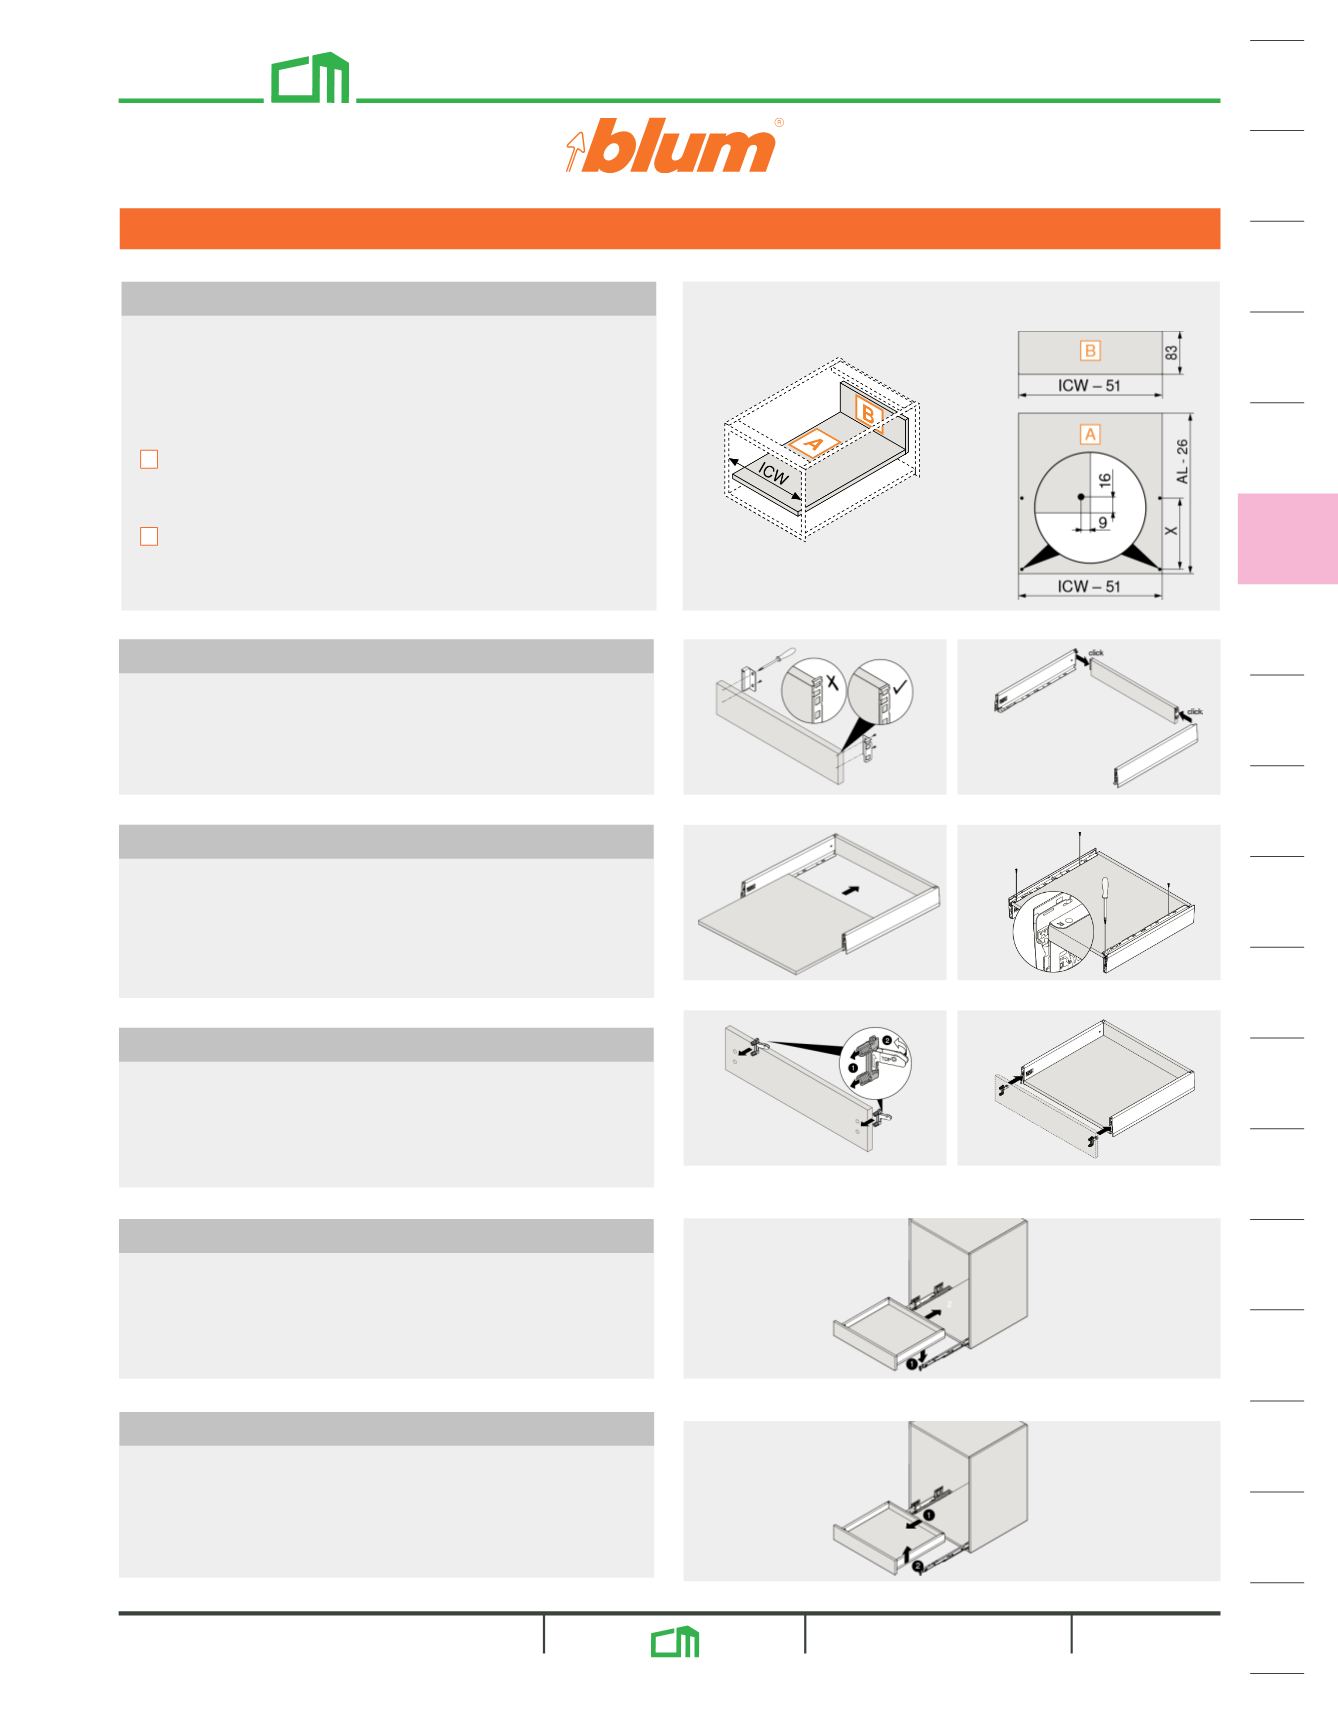
Step 1: Measure inside cabinet width (ICW)
Step 5: Drawer box installation
Step 4: Attach drawer front
Step 3: Drawer bottom installation
Step 2: Attach drawer back
Rear fixing brackets are attached with #6 x 1/2" truss head screws
(B612TH100). The drawer back, with rear fixing brackets attached,
snaps into the rear of both drawer profiles.
The drawer bottom slides into the drawer profiles.
Push the drawer bottom flush with the front of the drawer.
Pre-bore and attach with wood screws (B612TH100).
Follow the installation drawing for locating hole positions for front
fixing brackets and pre-bore the necessary INSERTA Ø10x12 holes
(screw-on versions also available). Insert front fixing brackets into
pre-bored holes and screw as shown to secure.
Snap drawer front onto drawer.
Place drawer box onto cabinet profiles and insert drawer box into
cabinet.
Drawer box removal
Extend the drawer all the way forward. Lift up and pull out until you
feel the drawer release from the cabinet profile.
Use inside cabinet width (ICW) to calculate the drawer bottom and
back dimensions. Formulas are found on the specification page of
each application.
M Height example:
Drawer bottom:
Width = ICW minus 51 mm (2")
Length = Actual cabinet profile length minus 26 mm (1")
Drawer back:
Width = ICW minus 51 mm (2")
Height = 83 mm (3-1/4")
For best assembly results, use a BOXFIX-E-M.
Use 16 mm (5/8") material for
drawer bottom and back
ICW = Inside cabinet width
AL = Actual cabinet profile length
Position of drawer
base drill hole
A
B
05/24
DECORATIVE
HARDWARE
CABINET
HINGES
AVENTOS &
LIFTS
LOCKS &
CATCHES
DOORS &
DRAWERS
SLIDES
LIGHTING ORGANIZERS
KITCH./BATH
SHELF &
CLOSET
EDGING &
DECOR.WOOD
FURNITURE
HARDWARE
ADHESIVES LACQUER &
FINISHES
ABRASIVES
SHOP &
FINISHING
FASTENERS
TOOLS
DOOR
HARDWARE
SLIDES
800.533.0533
456c
Prices subject to change without notice.
M
c
M urray.com